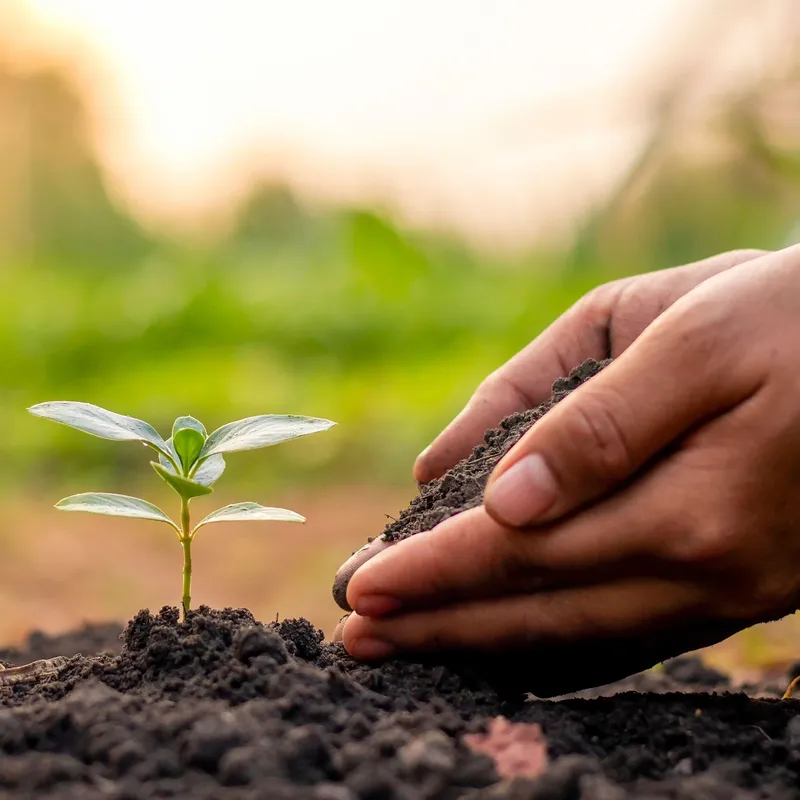
There is nothing quite as humbling - or frustrating - as staring at a tray of dirt for two weeks and seeing absolutely nothing happen. You've checked the packets, you've watered religiously, and yet, the soil remains stubbornly bare while your dreams of home-grown salsa or fresh summer salads slowly fade. We have all been there, standing over a plastic dome like a concerned parent, wondering if we bought "dud" seeds or if we are simply cursed with a black thumb.
The good news is that seeds aren't actually that mysterious; they are just tiny biological computers waiting for the right "code" to start their engines. If your seeds aren't popping up, it usually boils down to a few specific environmental factors that aren't quite hitting the mark. This guide will walk you through the most common reasons for germination failure and give you the practical, easy-to-implement solutions you need to get those sprouts breaking through the surface.
The Temperature Isn't "Just Right"
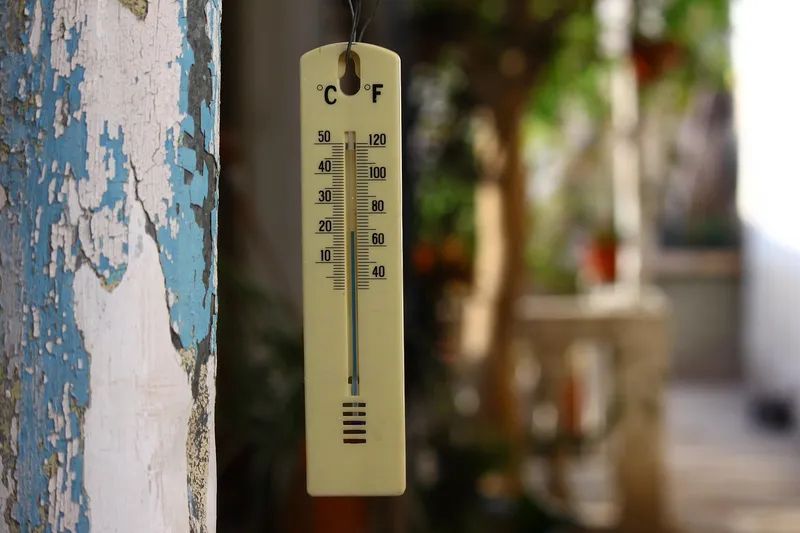
Temperature is the number one reason seeds fail to launch. Every vegetable has a "Goldilocks zone" - a specific range where the soil is warm enough to trigger growth but not so hot that it cooks the embryo. If you're trying to start peppers in a drafty garage or lettuce in a sweltering greenhouse, you're going to have a hard time.
Most summer favorites, like tomatoes, peppers, and eggplants, are heat-lovers. They ideally want soil temperatures between 70°F and 85°F (21°C - 29°C) to germinate. If your house is set to 65°F, the soil in your trays is likely even colder due to evaporation, which keeps those seeds in a deep, chilly slumber.
On the flip side, cool-season crops like spinach and peas will actually go dormant if the soil is too warm. They thrive in the 50°F to 65°F range. To solve this, consider investing in a waterproof seedling heat mat for your warm-weather crops. It provides consistent bottom heat that can cut germination time in half and drastically improve your success rate.
The Great Moisture Balancing Act
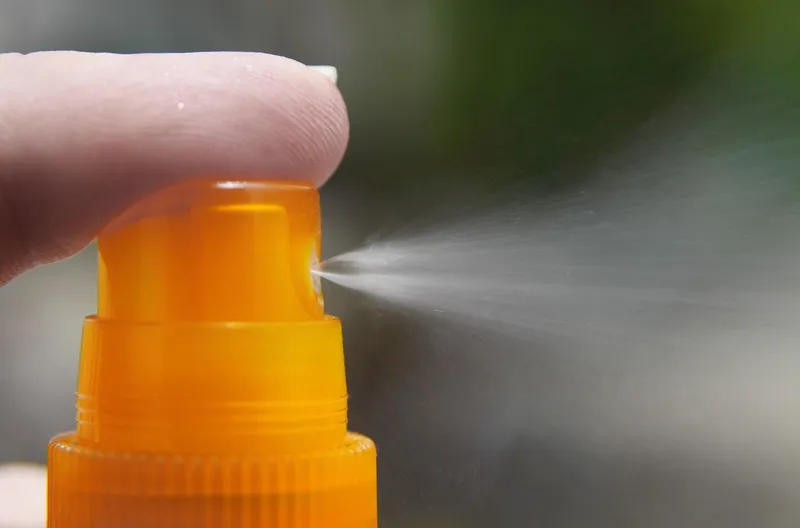
Seeds need water to swell up and break through their hard outer shells, a process called imbibition. However, there is a very fine line between "perfectly moist" and "underwater." If the soil dries out even once after the seed has begun to wake up, the tiny embryo inside will die almost instantly. It's a one-shot deal.
The most common mistake is watering too heavily with a watering can, which can wash seeds away or bury them deeper in the muck. Instead, use a spray bottle to mist the surface or water from the bottom by placing your trays in a shallow pan of water. This allows the soil to wick up moisture without disturbing the seeds.
To keep humidity consistent, use a clear plastic humidity dome or even just a bit of plastic wrap over your trays. This creates a mini-greenhouse effect that prevents the top layer of soil from drying out under your grow lights or on a sunny windowsill. Once you see the first green "hooks" appearing, remove the cover to let the air circulate.
You've Buried Them Too Deep

It's a natural instinct to want to tuck your seeds in deep to keep them safe, but many new gardeners plant them far deeper than necessary. A seed only has a limited amount of stored energy. If it's buried three inches deep, it might run out of "fuel" before it ever reaches the sunlight.
The general rule of thumb is to plant a seed twice as deep as its diameter. For a giant bean seed, that might be an inch. For a tiny, dust-like lettuce seed, that means barely covering it with a fine dusting of soil - or even just pressing it onto the surface. If you can barely see the seed, you've probably got it right.
If you suspect you've planted too deep, don't try to dig them up. You'll likely damage the fragile roots. Instead, take it as a lesson for the next round. Always check the back of the seed packet, as it will almost always list the ideal planting depth for that specific variety.
Oxygen Depletion and Soil Compaction

Believe it or not, seeds need to breathe. Germination is a high-energy process that requires oxygen. If your soil is packed down too tight or if it's sopping wet (waterlogged), the oxygen is squeezed out. This effectively smothers the seed, causing it to rot in the ground before it ever has a chance to sprout.
Never use "garden soil" from your backyard in small pots or trays. It's usually too heavy and contains clay that hardens like a brick when it dries. Instead, use a dedicated "seed starting mix." These mixes are usually soil-less, containing peat moss or coconut coir and perlite, which keeps the texture light, fluffy, and full of air pockets.
When you fill your trays, don't press the soil down with your palm. Just tap the tray on the table to let the soil settle naturally. This ensures there is plenty of room for both water and air to reach the seed, giving it the best environment to thrive.
The Seeds Are Just Too Old
While some seeds can stay viable for a decade if stored in a cool, dark, and dry place, others have a very short shelf life. Onions, parsnips, and spinach seeds are notorious for losing their "spark" after just a year or two. If you're using a packet you found in the back of the garage from five years ago, your germination rate might be near zero.
If you aren't sure if your seeds are still good, try the "paper towel test." Place 10 seeds on a damp paper towel, fold it over, and put it in a zip-top bag in a warm spot. After a week or two, count how many have sprouted. If only 2 out of 10 grow, your seeds are old, and you'll need to plant them much more thickly to get the results you want - or just buy a fresh pack.
To keep your seeds fresh for longer, store them in a sealed container in a cool part of the house. Some gardeners even keep their seeds in the refrigerator (not the freezer!) to mimic a dormant winter state, which can significantly extend their lifespan.
Lighting Requirements: The "Special" Cases
While most seeds don't need light until they've actually sprouted, some vegetable and herb seeds are "photoblastic," meaning they actually require light to wake up. If you cover these seeds with soil, they will stay dormant indefinitely because they think they are still buried too deep to survive.
Common vegetables and herbs that need light to germinate include lettuce, celery, and savory. For these types, you simply press them into the top of the damp soil and leave them exposed. This is where using a humidity dome becomes vital, as these surface-level seeds are the most prone to drying out.
On the other hand, some seeds like dark. Alliums (onions and leeks) often prefer a bit of darkness to get going. Always read the fine print on your seed packet. If it says "sow on surface," don't bury it!
Damping Off: The Silent Killer

Sometimes the seed actually *does* germinate, but it dies before you even see it, or shortly after it emerges. This is usually due to "damping off," a fungal disease that thrives in cold, wet, stagnant conditions. You might see a tiny sprout appear, only to have it wither and fall over at the base a day later.
To prevent this, ensure your containers are clean before you start. If you're reusing old plastic trays, give them a quick soak in a diluted bleach solution (1 part bleach to 9 parts water). This kills any lingering fungal spores from the previous season.
Good airflow is also a great deterrent. Once your seeds have sprouted, a small oscillating fan nearby can keep the air moving, which strengthens the stems and prevents fungus from settling on the soil surface. Think of it as a little workout for your baby plants.
Seeds That Need a "Wake-Up Call"
Some seeds have incredibly tough outer shells that are designed to survive being eaten by birds or weathered by harsh winters. These seeds often need a little help breaking through that "armor." This is common with larger seeds like sweet peas, okra, or even some types of squash.
One trick is "scarification," which involves lightly nicking the seed coat with sandpaper or a nail clipper. This allows water to penetrate the shell more easily. Another method is "stratification," which mimics a winter cycle by placing seeds in the fridge for a few weeks before planting.
For many gardeners, a simple 12-to-24-hour soak in a bowl of lukewarm water before planting is enough to jumpstart the process. You'll often see the seeds swell up significantly, which is a great sign that they are ready to hit the dirt running.
Gardening is rarely a perfect science, and even the most experienced growers deal with the occasional "no-show" in their seed trays. Don't let a few empty cells discourage you. Each failed tray is just a data point, telling you a little bit more about what your specific environment needs. Check your temps, watch your water, and keep trying - the moment that first green loop pushes through the soil makes all the troubleshooting worth it.